


How to Use FTP to Manage Your Website Files in Windows
The File Transfer Protocol (FTP) is a network protocol that enables large-scale file transfers across IP networks. An HTTP web service or email can be utilized to manage file and data transmission without FTP, but these alternatives require more concentration, control, and precision than FTP manage website files give. FTP helps to transfer files from one system to another. It has various typical applications, including backup, replication, access, and data loading.
Backup services or individual users can utilize FTP to backup data from one location to a secure backup server that provides FTP services. Replication, like backup, involves duplicating data from one system to another but uses a complete approach to improve availability and resilience. FTP can also be used to make this easier. FTP is also often used to access shared web hosting and cloud services to load data into a remote server. This article will explain the FTP setup in Windows and FTP manage website files.
Requirements
- Operating system and version: Windows Server 2022 (64-bit) and earlier.
- Administrator privileges to access your Windows system.
- FTP client: FileZilla.
How to Use FTP to Manage Your Website Files in Windows
Step 1: Setting Up FTP
Installing FTP on Windows
You can follow the below steps to install FTP on Windows.
Select Dashboard > Manage > Add Roles and Features in Windows Server Manager.
Proceed to the Installation Type step of the Add Roles and Features wizard and confirm Role-based or feature-based installation.
Go to the Server Roles stage and verify the Web Server Role (IIS). It is checked if you have already installed IIS as a web server. Confirm the installation of the IIS Management Console utility if requested.
Verify the FTP Server role service under Web Server Role (IIS) > Role Services. If you do not require Web Server role service, uncheck it.
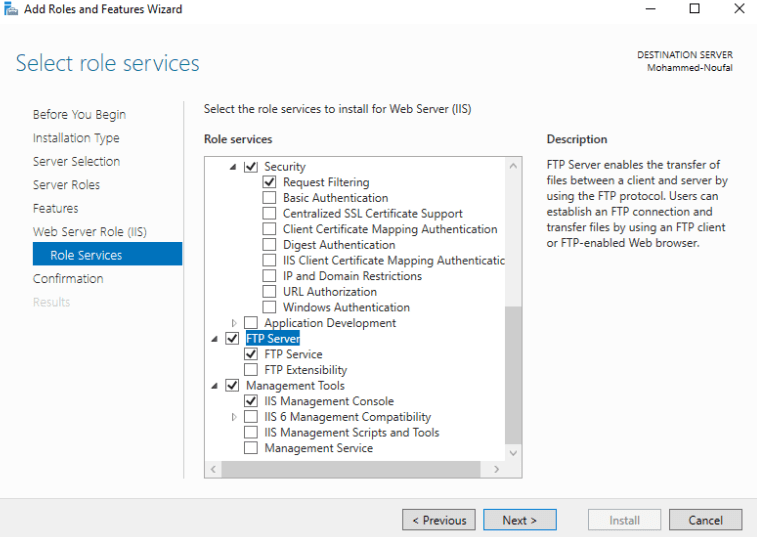
Finish the wizard by clicking Install and wait for the installation to finish.
Configuring FTP for Website Management
To establish a secure connection between the client and the server, the FTP server requires a Transport Layer Security (TLS) certificate or a Secure Sockets Layer (SSL) certificate. The certificate contains information about the server's identity and the encryption algorithm used to build the secure channel. This makes it easier for end users to confirm the identification of a remote machine. Depending on the use case or situation, the TLS/SSL certificate type may be self-signed, domain-signed, or third-party-signed.
IIS allows you to generate both a self-signed certificate and a domain certificate. Follow the procedures below to generate a self-signed certificate.
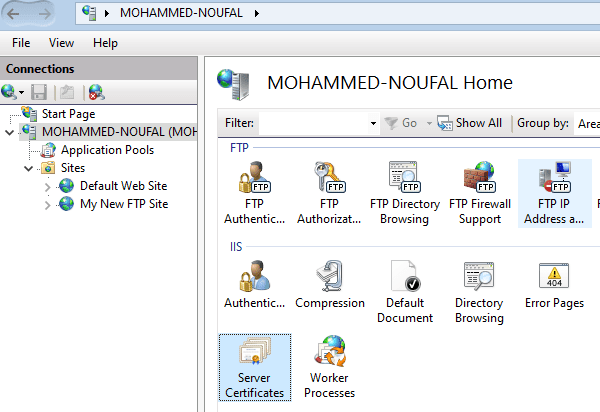
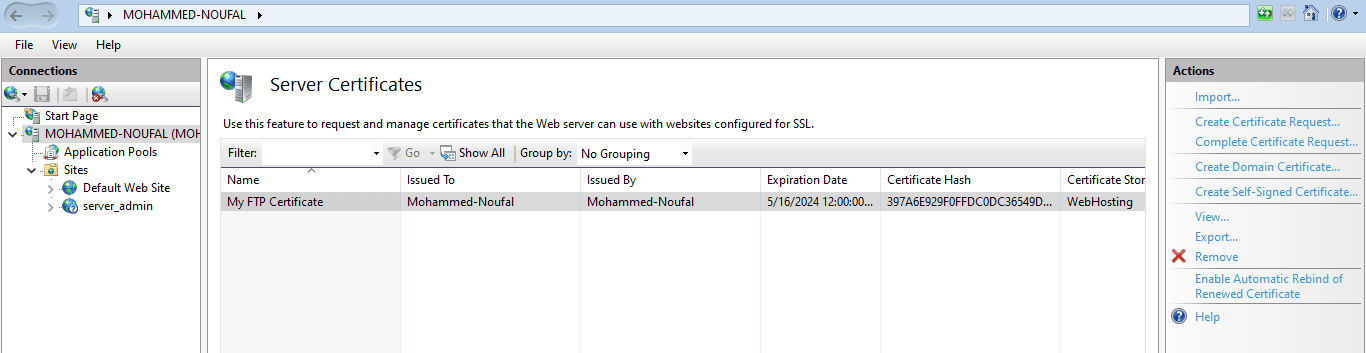
In IIS Manager, Click on Server Certificates under the IIS section.
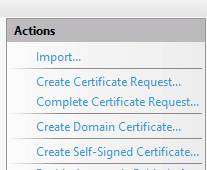
Select Create Self-Signed Certificate from the Actions menu on the IIS Manager's right-hand side.
Enter the name of the certificate and click OK to submit.
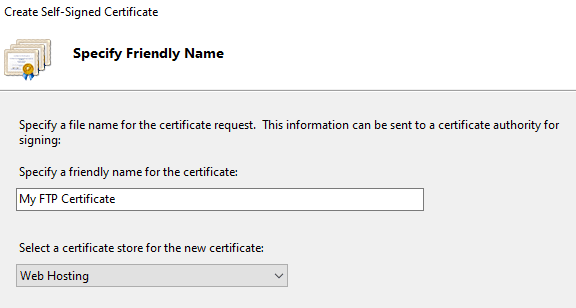
Here is the output.
If an external firewall or NAT protects your server, you must provide the FTP server with its external IP address to enable passive mode connections. To finish this process, follow the instructions below.
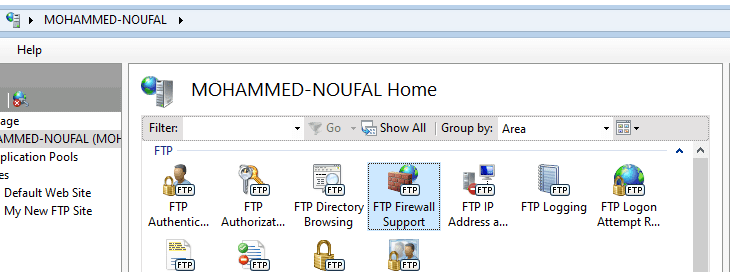
In IIS Manager, Click on FTP Firewall Support under the FTP section.
Enter Data Channel Port Range and the External IP Address of Firewall. Please replace the values as per your requirements.
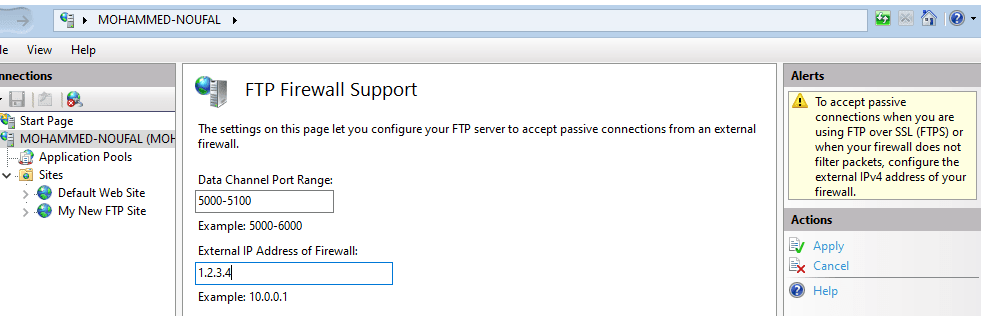
When working behind an external firewall, you must allow ports for data connections in addition to FTP Port 21 and an implicit TLS/SSL FTP Port 990. You may not want to open the default port range of 1024-65535. In this scenario, you must instruct the FTP server to only use the range opened on the firewall. You can use a Data Channel Port Range box to do the same. You must restart the FTP service whenever you alter this range.
Click Apply action to reflect the changes.
When the IIS FTP server is installed on a Windows workstation, an internal Windows firewall with rules for Ports 21, 990, and 1024-65535 is automatically established. On some Windows versions, the rules are initially disabled. To enable or alter the rules, follow these steps:
Go to Start and open the Control Panel.
Select System and Security > Windows Defender Firewall.
Click on Advanced Settings > Inbound Rules and find three FTP server rules.
If the rules are disabled, you can enable the rules by clicking on Actions and then Enable Rule.
Step 2: Connecting to the Server Using FTP
Obtaining Login Credentials
You can follow these steps to create a new FTP User with Windows.
Go to Computer Management and open Local Users and Groups. Or you may also use the Win+R shortcut to enter Run and type lusrmgr.msc.
Right-click Users, and you will get the window to enter new-user details.
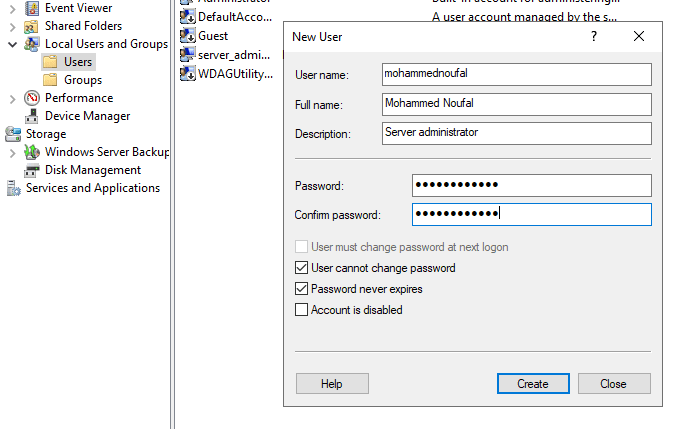
Once you enter the details, click on Create.
Using FTP Client Software to Connect to the Server
You can connect to the server with an FTP client, such as FileZilla, by following the below steps.
Open FileZilla.
Navigate to File > Site Manager. The Site Manager settings dialogue box will appear. Under the General tab, enter the following information:
- Protocol: FTP File Transfer Protocol
- Host/Address: Your FTP Host Address (e.g., Server hostname or Domain name)
- Port: 21
- Encryption: Use explicit FTP over TLS if available
- Logon Type: Normal
- User: Your FTP username
- Password: Your FTP password

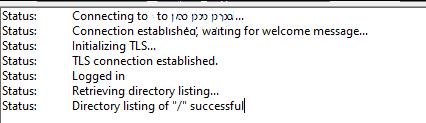
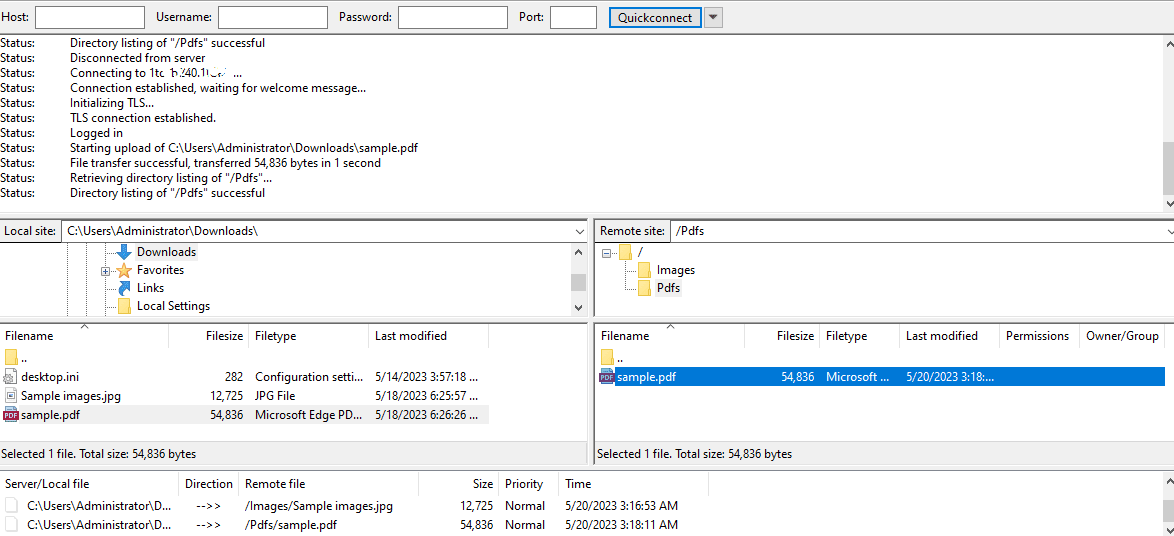
Click on the Connect button. The results of the connection will be displayed in the window below. A successful connection will result in the message Directory listing successful.
Step 3: Uploading Files Using FTP
Navigating File Directories Using FTP Client Software
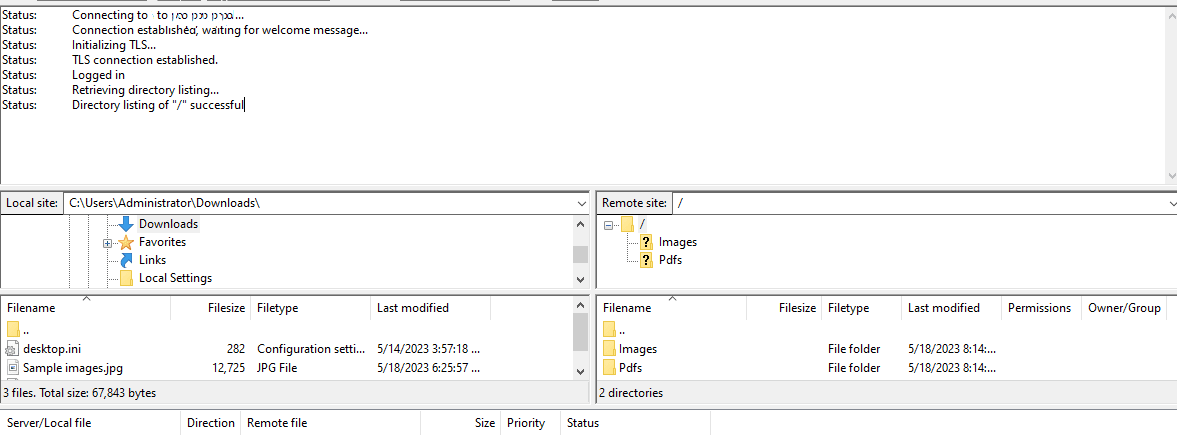
When you connect to the server using an FTP client (FileZilla), the contents of your local machine will appear on the left side of the FileZilla window (Local site), and the contents of the connected FTP user will appear on the right side of the FileZilla window (Remote site).
Understanding File Permissions
Several attributions, or permissions, are associated with each file and folder on your web server. These permissions consist of the following:
- Read: Determines whether the web server can access the file/folder.
- Write: Determines if the web server can write to the file/folder.
- Execute: Determines whether or not the web server can execute the file/folder.
Each permissions set is assigned a numeric code identifying the type of rights given to that file or folder.
- 644: Files with permissions set to 644 are viewable by everyone but writeable only by the file/folder owner.
- 755: Folders with permissions set to 755 are readable and executable by everyone, but they are writeable by only the file/folder owner.
- 777: Files and folders with permissions set to 777 are readable, writeable, and executable by everyone. For security reasons, do not use this permission on your web server unless required.
Uploading Files to the Server
You can upload files from the local machine to the server by following the steps below.
Connect to FTP.
Locate the folder containing the files you want to upload in FileZilla's Local Site section. Your local machine files are stored on the Local Site.
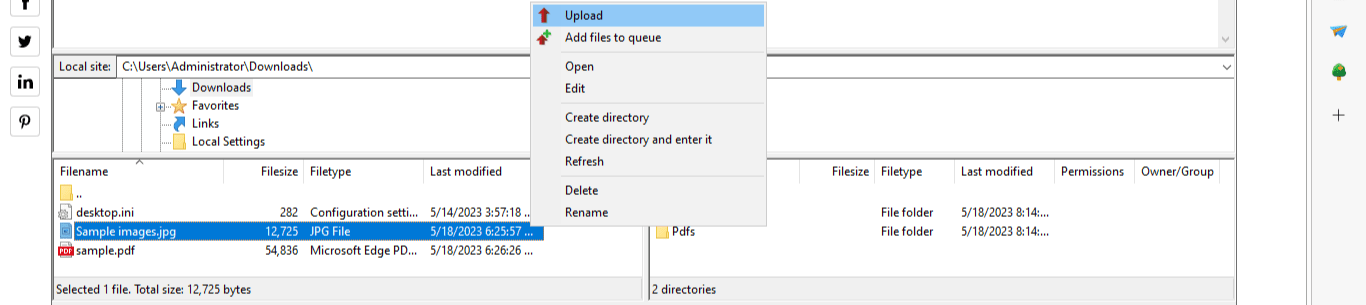
Select and right-click on the file. Click Upload or drag the file from the Local Site to the Remote Site. You can also pick multiple files at once.
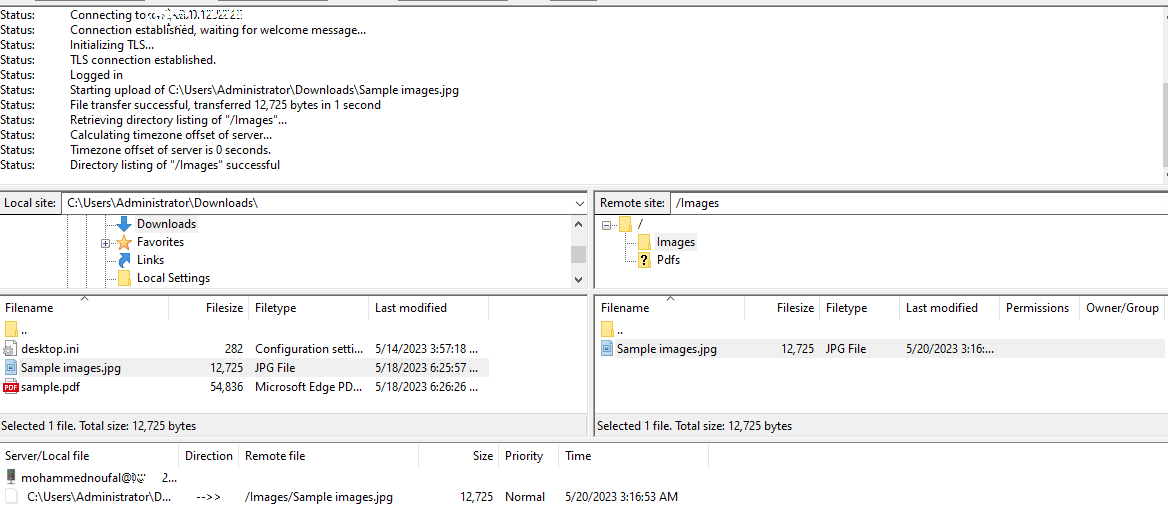
Here are the outputs.
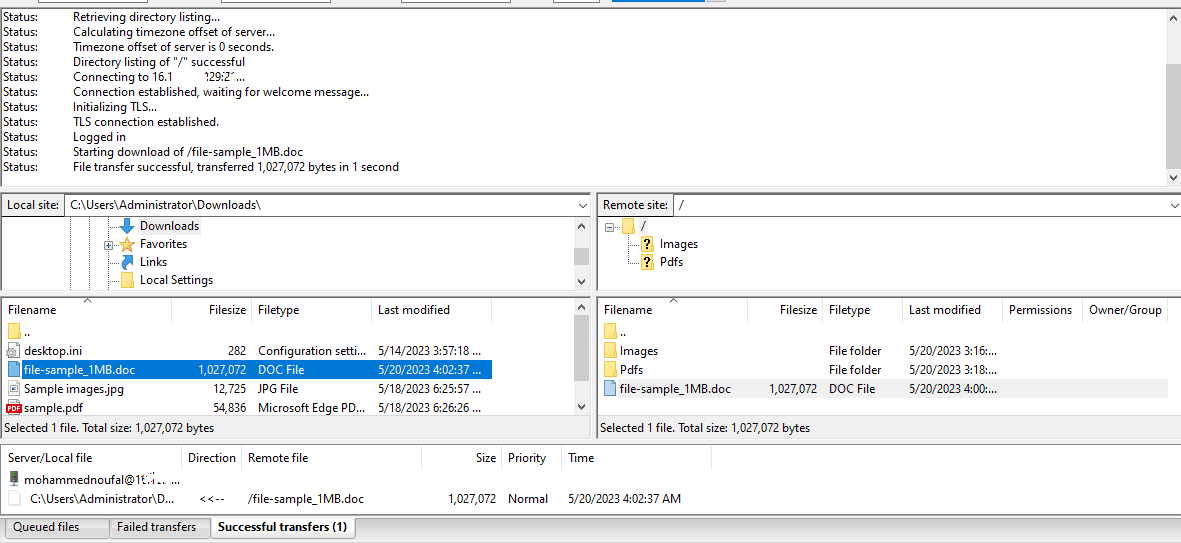
Step 4: Downloading Files Using FTP
Downloading Files from the Server to a Local Machine
You can download files from the server to the local machine by following the steps below.
Connect to FTP.
Locate the folder containing the files you want to download in FileZilla's Remote Site section.
Select and right-click on the file. Click Download or drag the file from the Remote Site to the Local Site. You can also pick multiple files at once.
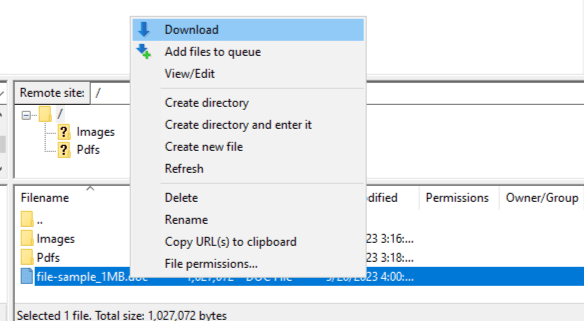
Here is the output.
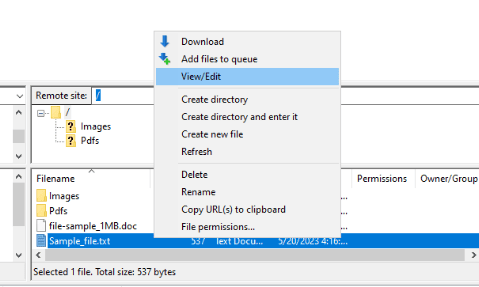
Step 5: Modifying Files Using FTP
Editing Files Using FTP Client Software
You can edit the files from the server or local machine by following the steps below.
Connect to FTP.
Right-click on the file that you want to edit. Click on View/Edit. Don’t forget to save the file after making changes.
Understanding the Importance of Backup Files
The backup goal is to make a copy of the data that can be restored if the primary data is lost. Prior data failures can occur due to hardware or software failure, data corruption, a human-caused incident, such as a malicious attack (virus or malware), or unintentional data deletion. Backup copies enable data to be restored from a previous point in time, assisting the business in recovering from an unanticipated event.
To minimize the lost data between backups, backup copies should be made consistently and frequently for optimal results. Data loss, when recovering from a backup, increases proportionally to the interval between backup copies. Keeping several copies of data gives you the security and flexibility to restore to a point in time that was not affected by data corruption or malicious attacks.
Conclusion
File transfers through the cloud or between systems are made possible using FTP. To carry out FTP transfers, users need an internet connection. FTP is a necessary tool for individuals who create and maintain websites. Now you know about the FTP setup in Windows and FTP manage website files.
Related Articles:


About the Author: Mohammed Noufal
Mohammed Noufal is a B.Tech graduate with a decade of experience in server administration and web hosting. He is a father to two daughters and finds fulfillment in their growth. In his free time, he enjoys blogging, sharing experiences, and listening to music. With a strong technical background, family commitment, and creative outlets, he represents a well-rounded life journey.


Our Sales and Support teams are available 24 hours by phone or e-mail to assist.
Latest Articles
Email security best practices for using SPF, DKIM, and DMARC
Read ArticleLinux dos2unix command syntax — removing hidden Windows characters from files
Read ArticleHow to use kill commands in Linux
Read ArticleChange cPanel password from WebHost Manager (WHM)
Read ArticleChange cPanel password from WebHost Manager (WHM)
Read Article